
Whether you’re looking to simply even out your skin tone, add a touch of color, or create a polished look for work or a special occasion, understanding the fundamentals is key. This comprehensive guide is designed specifically for beginners, breaking down the entire process into easy-to-follow, step-by-step instructions. We’ll walk you through everything from preparing your skin to the final setting spray, ensuring you feel empowered and excited about your makeup journey. So grab your brushes, clear your vanity, and let’s dive into creating a radiant, confident you, one brush stroke at a time!
The Foundation of Flawless: Skincare First!
Before you even think about reaching for a foundation or concealer, remember this golden rule: great makeup starts with great skin. No amount of product can truly replicate the look and feel of healthy, well-cared-for skin. Think of your skin as the canvas; the smoother and more prepped it is, the better your makeup will apply and last. This initial step isn’t just about aesthetics; it’s a vital part of your overall self-care routine, setting a positive tone for your day.
A consistent and effective skincare routine lays the groundwork for seamless makeup application. For those wondering how to create self care routine, integrating skincare is an excellent starting point. It’s a moment of mindful attention to yourself, a ritual that nurtures both your skin and your spirit. When your skin is hydrated and balanced, makeup glides on effortlessly, blends seamlessly, and wears beautifully throughout the day. Conversely, dry patches, excessive oiliness, or unaddressed skin concerns can cause makeup to look patchy, cling to imperfections, or simply not last.
Here’s a basic pre-makeup skincare regimen that works wonders for most skin types:
- Cleanse: Start with a gentle cleanser to remove any impurities, excess oil, or residual products from your nighttime routine. A clean slate is essential for product absorption and even application. Choose a cleanser that suits your skin type – hydrating for dry skin, balancing for oily skin, and gentle for sensitive complexions.
- Tone (Optional but Recommended): A toner can help balance your skin’s pH, provide an extra layer of cleansing, and prep your skin to better absorb subsequent products. Look for alcohol-free options that hydrate rather than strip the skin.
- Treat (If Applicable): If you use serums for specific concerns like brightening, anti-aging, or hydration, apply them now. Give them a minute or two to absorb fully before moving on. For those with specific concerns like blemishes, referencing resources on the best skincare routine acne prone skin can be incredibly helpful here. Incorporating targeted treatments will improve skin health over time, leading to less reliance on makeup to cover imperfections.
- Moisturize: This is non-negotiable! Even oily skin needs moisture. A good moisturizer hydrates the skin, plumps it up, and creates a smooth, supple surface for makeup. For daytime, opt for a lighter, fast-absorbing formula. Allow your moisturizer to fully sink in for at least 5-10 minutes before applying primer or foundation. This prevents pilling and ensures your makeup doesn’t slip and slide.
- SPF: The final and perhaps most crucial step in your morning skincare is sunscreen. Protecting your skin from harmful UV rays is paramount for preventing premature aging, hyperpigmentation, and skin cancer. Choose a broad-spectrum SPF of 30 or higher. Many moisturizers now come with SPF integrated, offering a convenient two-in-one solution. Apply it generously and let it absorb completely before moving on to makeup.
By dedicating these few minutes to your skincare, you’re not just preparing your face for makeup; you’re investing in the long-term health and radiance of your skin. It’s a foundational step that will make all the difference in how your makeup looks and feels throughout your day, right into 2026 and beyond.
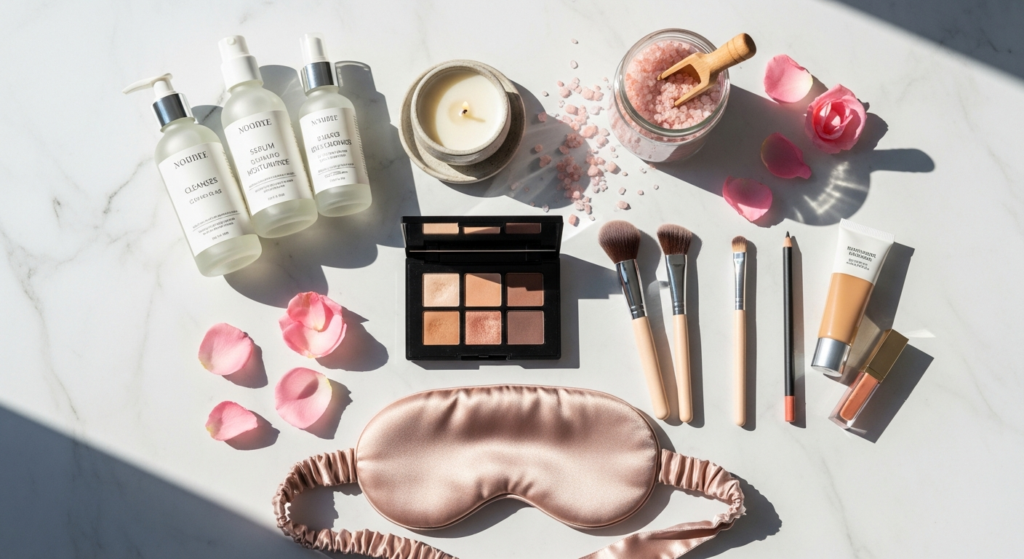
Building Your Beginner Makeup Kit: Essentials You Actually Need
Stepping into a beauty store can feel overwhelming with the sheer volume of products available. For a beginner, the goal isn’t to buy everything, but to curate a small, effective collection of essentials that will help you achieve a polished, natural look. Think quality over quantity. These are the fundamental tools and products you’ll want to start with to master the basics of makeup application.
Essential Products:
- 1. Primer: This magical potion creates a smooth canvas, helps your makeup last longer, and can address specific concerns like oiliness or dryness.
- What it does: Creates a barrier between your skin and makeup, fills in pores, smooths texture, and helps foundation adhere better.
- Types: Hydrating, mattifying, pore-filling, color-correcting. Start with a hydrating or a universal primer.
- 2. Foundation, BB Cream, or Tinted Moisturizer: Your choice depends on your desired coverage and finish.
- What it does: Evens out skin tone, provides a base color, and can offer light to full coverage.
- Options:
- Tinted Moisturizer: Lightest coverage, very natural, great for “no makeup” makeup looks.
- BB Cream (Beauty Balm): A step up from tinted moisturizer, offering light-to-medium coverage with added skincare benefits.
- Foundation: Ranges from sheer to full coverage, available in various finishes (matte, dewy, natural).
- Tip: For beginners, a BB cream or light-to-medium coverage foundation is often easiest to work with.
- 3. Concealer: Your secret weapon for brightening and concealing imperfections.
- What it does: Hides dark circles, blemishes, redness, and hyperpigmentation.
- Types: Liquid (most common for beginners), cream.
- Shade: For undereyes, choose one shade lighter than your skin tone. For blemishes, match your skin tone exactly.
- 4. Setting Powder: Locks everything in place.
- What it does: Sets liquid and cream products, reduces shine, and increases makeup longevity.
- Types: Loose powder (lighter feel, good for baking), pressed powder (convenient for touch-ups).
- Shade: Translucent (invisible) or a shade matching your foundation.
- 5. Blush: Adds a healthy flush of color to your cheeks.
- What it does: Brings life and dimension back to your face after foundation.
- Types: Powder (easiest for beginners), cream, liquid.
- Shade: Peachy, pink, or berry tones that complement your natural flush.
- 6. Mascara: Instantly brightens and defines your eyes.
- What it does: Lengthens, volumizes, and curls lashes, making eyes appear larger and more awake.
- Color: Black is universally flattering, but brown can offer a softer look.
- 7. Eyebrow Product: Frames your face and defines your eyes.
- What it does: Fills in sparse areas, defines shape, and sets brows in place.
- Options: Pencil (great for precise strokes), tinted brow gel (quick and easy), brow powder.
- Shade: Choose a shade that matches your natural brow hair or is one shade lighter.
- 8. Lip Balm/Gloss/Tinted Lip Product: For a hydrated, polished pout.
- What it does: Hydrates, adds a touch of color, and completes your look.
- Options: Clear lip balm, tinted lip balm, lip gloss, a natural-looking lipstick or lip tint.
Essential Tools:
- 1. Makeup Sponges: Ideal for blending liquid and cream products.
- Uses: Foundation, concealer, cream blush. Dampen before use for a seamless finish.
- 2. Foundation Brush: (Optional, if you prefer brushes over sponges for foundation)
- Types: Flat-top kabuki or a densely packed buffing brush work well for even application.
- 3. Powder Brush: Large, fluffy brush for applying setting powder.
- 4. Blush Brush: A medium-sized, fluffy brush, often angled, for precise blush application.
- 5. Eyelash Curler: For an extra lift and curl to your lashes before mascara.
- 6. Brow Spoolie/Brush: For grooming brows before and after product application. Many brow pencils have a spoolie on the other end.
Remember, building your kit is a personal journey. As you become more comfortable, you can explore other products like bronzer, highlighter, eyeshadows, and eyeliner. But for now, these essentials will provide a solid foundation for your beginner makeup skills, helping you create a beautiful, everyday look effortlessly.
Step-by-Step Application Guide: Your Daily Glow Up
Step 1: Prime Time – Creating a Smooth Canvas
After your skincare has fully absorbed, it’s time for primer. This crucial step acts as a bridge between your skincare and makeup, optimizing your skin’s surface for better application and wear. Skipping primer is a common beginner mistake that can lead to makeup fading quickly or looking less smooth.
- Why Prime? Primer helps to:
- Smooth out skin texture by subtly filling in pores and fine lines.
- Create a barrier that prevents makeup from sinking into your skin or oxidizing.
- Increase the longevity of your makeup, making it last hours longer.
- Address specific skin concerns (e.g., mattify oily areas, hydrate dry patches, color-correct redness).
- Choosing Your Primer:
- For most beginners, a hydrating or universal silicone-based primer is a great starting point. Hydrating primers add moisture and give a healthy glow, while silicone primers create a smooth, blurring effect.
- If you have oily skin, a mattifying primer can control shine throughout the day.
- If large pores are a concern, a pore-filling primer will visibly minimize their appearance.
- Application:
- Dispense a pea-sized amount onto your fingertips.
- Gently dot it across your face – forehead, nose, cheeks, chin.
- Using clean fingertips, gently massage the primer into your skin in light, upward, and outward strokes. Focus on areas where you typically apply foundation or where you have larger pores or fine lines.
- Allow the primer to set for 1-2 minutes before moving on to the next step. This allows it to create its optimal base.
Step 2: Foundation & Concealer – Evening Out Your Tone
This is where you unify your skin tone and create a base for the rest of your makeup. The goal isn’t to mask your face, but to create a more even complexion that still looks like your skin.
Foundation/BB Cream/Tinted Moisturizer:
- Choosing the Right Shade: This is arguably the most challenging part for beginners.
- Test on your jawline: Apply a small stripe of 2-3 shades directly onto your jawline (not your hand!). The shade that disappears into your skin, without leaving a noticeable line or looking too light/dark, is your match.
- Consider your undertone: Are you cool (pink/red/blueish), warm (yellow/golden/peachy), or neutral? Most brands indicate undertones.
- Natural light: Always check your shade match in natural daylight if possible.
- Application Techniques:
- Start small: Dispense a small amount (a pump or a pea-sized drop) onto the back of your hand or directly onto a damp makeup sponge.
- Dot and blend: Dot the product onto the center of your face – forehead, nose, chin, and cheeks.
- Blend outward:
- With a damp makeup sponge: Gently bounce the sponge over your skin, pressing and rolling the product in. This creates a natural, airbrushed finish.
- With a foundation brush: Use gentle buffing or sweeping motions, working from the center of your face outwards.
- With clean fingertips: Use warming, gentle patting motions to blend. This works best for lighter coverage products like tinted moisturizers or BB creams.
- Focus on where you need it: Often, you need more coverage in the T-zone and less on the perimeter of your face. Blend seamlessly into your jawline and neck to avoid a harsh line.
- Build gradually: If you need more coverage, add another thin layer only where necessary, rather than applying a thick layer all at once.
Concealer:
- Choosing the Right Shade & Type:
- For undereyes, choose a liquid concealer that is one shade lighter than your foundation to brighten. Look for formulas that are hydrating and won’t crease.
- For blemishes and redness, choose a concealer that matches your foundation shade exactly to seamlessly blend in. A slightly thicker cream formula might offer better coverage for spots.
- Application:
- Under eyes: Apply in an inverted triangle shape under your eyes (a V-shape), rather than just a crescent moon. This brightens the whole area.
- Blemishes/Redness: Dot a tiny amount directly onto the blemish or red area.
- Blend:
- Under eyes: Use your ring finger (it applies the least pressure) or a small, damp makeup sponge to gently pat and blend the concealer into your skin. Be gentle; the under-eye area is delicate.
- Blemishes: Use a small, clean brush or your ring finger to gently tap the product into the skin, feathering the edges so it blends seamlessly with your foundation. Avoid rubbing, which can wipe the product off.
Step 3: Setting It Right – Powder for Longevity
Once your liquid and cream products are applied, setting them with powder is essential, especially for beginners. This step locks everything in place, prevents creasing, and helps to control shine throughout the day.
- Why Powder?
- Sets foundation and concealer, extending wear time.
- Absorbs excess oil, reducing shine.
- Creates a smoother, more matte finish.
- Prevents creasing, particularly under the eyes.
- Choosing Your Powder:
- Translucent Loose Powder: A fine, colorless powder that is great for setting the entire face without adding extra coverage or altering your foundation shade. Ideal for an overall soft, matte finish.
- Pressed Powder: More portable and offers a bit of extra coverage. Good for touch-ups on the go.
- Application:
- For under eyes: If you have fine lines, gently tap out any creases under your eyes with your ring finger or a damp sponge before applying powder. Then, pick up a tiny amount of translucent loose powder on a small, fluffy brush or a damp sponge. Lightly press or roll the powder into the under-eye area.
- For the rest of your face: Dip a large, fluffy powder brush into your chosen powder, tap off any excess. Lightly sweep or press the powder over your T-zone (forehead, nose, chin) and any other areas where you tend to get oily. You don’t need to powder your entire face if you prefer a dewier look on your cheeks.
- Less is more: Use a light hand. Too much powder can make your skin look dry, cakey, or accentuate texture.
Step 4: Adding Color & Definition – Blush, Bronzer, & Highlight (Optional)
Foundation and concealer can sometimes make your face appear flat. These steps bring back warmth, color, and dimension, making your face look more alive and sculpted. Start with blush, and add bronzer/highlighter as you get more comfortable.
Blush:
- Why Blush? Adds a healthy, natural flush to your cheeks, making you look more vibrant and youthful.
- Choosing Your Shade:
- Look for shades that mimic your natural flush – soft pinks, peaches, or rosy tones.
- Fair skin tones often suit lighter pinks or peaches.
- Medium skin tones can wear warmer peaches, corals, or mauves.
- Deep skin tones can rock vibrant berries, reds, or deep oranges.
- Application:
- Dip a fluffy blush brush into the powder blush, tap off any excess.
- Smile gently to find the apples of your cheeks (the roundest part).
- Apply the blush to the apples of your cheeks, then blend upwards and outwards towards your temples.
- Blend thoroughly to avoid harsh lines. The goal is a soft, diffused wash of color.
Bronzer (Optional for Beginners):
- Why Bronzer? Adds warmth to the face, mimicking a natural sun-kissed glow, and can subtly sculpt.
- Choosing Your Shade: Opt for a matte bronzer that is only 1-2 shades darker than your natural skin tone. Avoid anything too orange or shimmery for a natural look.
- Application:
- Using a fluffy brush (like your powder brush or a dedicated bronzer brush), apply bronzer to the areas where the sun would naturally hit your face: your temples, along your hairline, the tops of your cheekbones, and a touch on your jawline.
- Use light, sweeping motions and blend well to avoid any harsh lines or muddy patches.
Highlighter (Optional for Beginners):
- Why Highlighter? Catches the light, creating a luminous, glowing effect on high points of your face.
- Choosing Your Shade: Pearly or champagne tones often suit fair-to-medium skin, while golden or bronze tones look beautiful on medium-to-deep skin.
- Application:
- Using a small, fluffy brush or your fingertip, lightly apply highlighter to the tops of your cheekbones (above your blush), down the bridge of your nose, on your Cupid’s bow (the dip above your upper lip), and a tiny bit on your brow bone (just under your eyebrow arch).
- Blend it gently to diffuse the shimmer.
Step 5: Eye-Opening Essentials – Brows & Mascara
These two steps can dramatically transform your face, making you look more awake and polished without much effort. They frame your eyes and add definition.
Brows:
- Why Brows? Well-groomed brows frame your face, enhance your eye shape, and create a more polished look. Even subtle definition can make a huge difference.
- Choosing Your Product:
- Brow Pencil: Great for beginners. Allows for precise hair-like strokes to fill in sparse areas. Many come with a spoolie brush on the other end.
- Tinted Brow Gel: Quick and easy. Tints, tames, and sets brows in one step. Excellent for naturally fuller brows that just need a bit of definition and hold.
- Brow Powder: Offers a softer, more diffused look. Applied with an angled brush.
- Application:
- Groom: Use a spoolie brush to comb your brow hairs upwards and outwards, shaping them.
- Fill (Pencil/Powder): Using light, feathery strokes, fill in any sparse areas, focusing on the natural shape of your brow. Start from the arch and work towards the tail, then lightly fill in the inner part of the brow. Avoid drawing a harsh line.
- Set (Gel): If using a tinted brow gel, simply brush it through your brows in the direction of hair growth to add color and hold.
- Blend: Use the spoolie again to gently brush through your brows. This softens any harsh lines and ensures the product is evenly distributed, making them look natural.
Mascara:
- Why Mascara? It’s an instant eye-opener! Mascara makes your lashes look longer, thicker, and darker, making your eyes appear larger and more defined.
- Application:
- Curl (Optional but Recommended): If you have straight lashes, use an eyelash curler. Place the curler at the base of your lashes, gently clamp down, and hold for 5-10 seconds. Release, move the curler slightly up the lash, and clamp again. Repeat 2-3 times for a beautiful curl.
- Wiggle and sweep: Take your mascara wand and wipe off any excess product on the rim of the tube. Place the wand at the base of your upper lashes, wiggle it slightly from side to side, and then sweep upwards to the tips.
- Build layers: Apply 1-2 coats for a natural look. If you desire more drama, apply a third coat, but do so before the mascara fully dries to prevent clumping.
- Lower lashes: For lower lashes, hold the wand vertically and lightly coat the individual lashes. Be careful to avoid smudges.
- Clean up: If you get any mascara smudges, let them dry completely, then gently flake them off with a clean cotton swab or a clean spoolie.
Step 6: The Perfect Pout – Lip Color & Care
Your lips complete your look. Even a simple balm can make a difference, enhancing your natural beauty.
- Why Lip Care/Color? Hydrates lips, adds a finishing touch, and can express your mood.
- Choosing Your Product:
- Lip Balm: Essential for hydration. Can be clear or tinted for a subtle wash of color.
- Lip Gloss: Adds shine and a plumping effect. Can be clear or colored.
- Tinted Lip Product/Natural Lipstick: Offers more color payoff than a balm but less intensity than a full-coverage lipstick. Look for shades close to your natural lip color, or a “my lips but better” shade.
- Application:
- Prep: Ensure your lips are moisturized. If they’re dry or flaky, gently exfoliate them beforehand.
- Apply:
- Balm/Gloss: Simply swipe directly onto your lips.
- Tinted Lip Product/Lipstick: Apply directly from the bullet or use a lip brush for more precision. Start from the center of your upper lip, move outwards, then fill in the lower lip.
- Blot (for lipstick): If using lipstick, gently blot your lips on a tissue to remove excess product and prevent transfer, while leaving behind a beautiful stain.
Step 7: Finishing Touch – Setting Spray (Optional but Recommended)
This final step is your secret weapon for making your makeup last all day and look more seamless.
- Why Setting Spray?
- Melds all your makeup layers together, taking away a powdery look.
- Extends the wear of your makeup, especially in humid conditions or for long days.
- Adds a refreshing feel.
- Choosing Your Setting Spray:
- Look for a spray that suits your skin type: hydrating for dry skin, mattifying for oily skin, or a universal option for a natural finish.
- Application:
- Hold the bottle about 8-10 inches away from your face.
- Close your eyes and mouth.
- Spray in an ‘X’ and ‘T’ formation across your face to ensure even coverage.
- Allow it to air dry naturally. Do not rub!
Common Beginner Mistakes and How to Avoid Them

Learning any new skill involves a few missteps, and makeup is no exception. Recognizing common mistakes and knowing how to avoid them will fast-track your journey from beginner to confident makeup wearer. Don’t be discouraged if you encounter these; they’re part of the learning process!
- 1. Incorrect Foundation Shade Match:
- Mistake: Choosing a foundation that is too light, too dark, or has the wrong undertone, leading to a visible line at the jaw or an unnatural mask-like appearance.
- Solution: Always swatch foundation on your jawline, not your hand or arm, and check it in natural daylight. When in doubt, go a shade lighter, as it’s easier to darken with bronzer than to lighten a dark foundation. Ask for samples to test at home before committing to a full bottle.
- 2. Applying Too Much Product:
- Mistake: Layering on too much foundation, concealer, or powder in an attempt to cover everything, which can look cakey, heavy, and settle into fine lines.
- Solution: Remember the “less is more” mantra. Start with a tiny amount of product and build up coverage gradually, only where needed. Use thin layers and blend each layer thoroughly before adding more. This applies to all products, from foundation to blush.
- 3. Poor Blending:
- Mistake: Visible lines from foundation, concealer, blush, or bronzer, resulting in an unblended, patchy look.
- Solution: Blending is the most critical skill in makeup. Invest in good quality brushes or a damp beauty sponge. Take your time to buff and pat products into the skin until there are no harsh edges. Pay special attention to the jawline, hairline, and around the nose.
- 4. Skipping Skincare Prep:
- Mistake: Applying makeup directly onto dry, unmoisturized, or unprimed skin. This can lead to makeup clinging to dry patches, looking patchy, or fading quickly.
- Solution: Always start with a clean, moisturized, and primed face. Allow each skincare step to fully absorb before moving to the next. This creates a smooth, hydrated canvas that helps makeup apply flawlessly and last longer.
- 5. Neglecting Your Tools:
- Mistake: Using dirty brushes or sponges. Dirty tools harbor bacteria, which can lead to breakouts, and they don’t apply product smoothly or hygienically.
- Solution: Clean your brushes and sponges regularly (at least once a week for foundation/concealer tools, every 2-3 weeks for powder/blush brushes). Use a gentle brush cleaner or baby shampoo and warm water. Let them air dry completely. Clean tools are essential for a hygienic and seamless application.
- 6. Harsh Eyebrows:
- Mistake: Drawing on blocky, overly dark eyebrows that look unnatural and severe.
- Solution: Use light, feathery strokes to mimic natural brow hairs. Choose a brow product that matches your hair color or is one shade lighter. Always use a spoolie brush to comb through and soften any harsh lines after filling them in. The goal is to enhance, not redraw, your natural brow shape.
- 7. Forgetting to Set Makeup:
- Mistake: Not using powder or setting spray
Recommended Resources
You might also enjoy Spring Fashion Outfits For Women 2026 from Fashion Goggled.
Learn more about this topic in Home Cleaning Routine For Busy Moms at Veralyn Media.